The Mica material is one of the hypest parts of Windows 11 app design, but just like Acrylic before it,
it's a royal pain to use if you're unable to move your entire app to rely on the UWP/WinUI stack.
(Even XAML Islands can't save you here)
Now sure, you could add a WinRT Visual Brush to your app, then use raw Windows.UI.Composition APIs to build the material, mimicking what WinUI does... but I guess not even Microsoft wants to suffer through that, since they added a DwmWindowAttribute to apply a Mica brush to any given HWND.
enum DWMWINDOWATTRIBUTE
{
    DWMWA_NCRENDERING_ENABLED = 1,              // [get] Is non-client rendering enabled/disabled
    [...]
+   DWMWA_USE_HOSTBACKDROPBRUSH,                // [set] BOOL, Allows the use of host backdrop brushes for the window.
+   DWMWA_USE_IMMERSIVE_DARK_MODE = 20,         // [set] BOOL, Allows a window to either use the accent color, or dark, according to the user Color Mode preferences.
+   DWMWA_WINDOW_CORNER_PREFERENCE = 33,        // [set] WINDOW_CORNER_PREFERENCE, Controls the policy that rounds top-level window corners
+   DWMWA_BORDER_COLOR,                         // [set] COLORREF, The color of the thin border around a top-level window
+   DWMWA_CAPTION_COLOR,                        // [set] COLORREF, The color of the caption
+   DWMWA_TEXT_COLOR,                           // [set] COLORREF, The color of the caption text
+   DWMWA_VISIBLE_FRAME_BORDER_THICKNESS,       // [get] UINT, width of the visible border around a thick frame window
[...]
+   DWMWA_MICA_EFFECT = 1029,                   // [set] BOOL, undocumented??
    DWMWA_LAST
};
The usual warnings apply since this attribute is undocumented, but if it's anything like the Acrylic WindowCompositionAttribute trick, it should at least work until WinUI 3 is far enough in development. lmao
(Note: This attribute was removed from Windows 11 in insider build 22494, and replaced by DWMWA_SYSTEMBACKDROP_TYPE in builds 22523 and up. Scroll to the bottom of the article for more info!)
Applying this flag to a HWND in WPF is quite easy:
public partial class MainWindow : Window
{
    [DllImport("dwmapi.dll")]
    public static extern int DwmSetWindowAttribute(IntPtr hwnd, DwmWindowAttribute dwAttribute, ref int pvAttribute, int cbAttribute);

    [Flags]
    public enum DwmWindowAttribute : uint
    {
        DWMWA_USE_IMMERSIVE_DARK_MODE = 20,
        DWMWA_MICA_EFFECT = 1029
    }

    public MainWindow()
    {
        InitializeComponent();
        ContentRendered += Window_ContentRendered;
    }

    private void Window_ContentRendered(object sender, System.EventArgs e)
    {
        // Apply Mica brush
        UpdateStyleAttributes((HwndSource)sender);
    }

    public static void UpdateStyleAttributes(HwndSource hwnd)
    {
        int trueValue = 0x01;
        DwmSetWindowAttribute(hwnd.Handle, DwmWindowAttribute.DWMWA_MICA_EFFECT, ref trueValue, Marshal.SizeOf(typeof(int)));
    }

    private void Window_Loaded(object sender, RoutedEventArgs e)
    {
        // Get PresentationSource
        PresentationSource presentationSource = PresentationSource.FromVisual((Visual)sender);

        // Subscribe to PresentationSource's ContentRendered event
        presentationSource.ContentRendered += Window_ContentRendered;
    }
}
To get the brush to actually show, we also need to remove WPF's built-in chrome with a WindowChrome override:
(You can also use WindowStyle.None, but WindowChrome lets you keep the system controls, which will come in handy.)
<Window x:Class="MicaTest.MainWindow"
        Background="Transparent">
    <WindowChrome.WindowChrome>
            <WindowChrome
            CaptionHeight="20"
            ResizeBorderThickness="8"
            CornerRadius="0"
            GlassFrameThickness="-1"
            UseAeroCaptionButtons="True" />
    </WindowChrome.WindowChrome>

    <TextBlock HorizontalAlignment="Center" VerticalAlignment="Center">Hello from Mica on WPF!</TextBlock>
</Window>
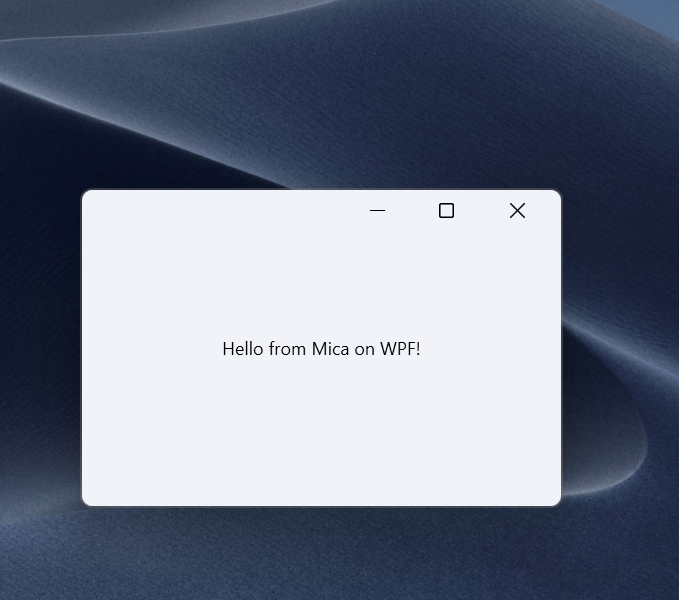
At this point, you'll have the material, but it won't change with the Windows theme.
Mica looks way better in Dark Mode than in Light(Don't @ me), so to handle that, you'll need to add the DWMWA_USE_IMMERSIVE_DARK_MODE flag to the mix.
This flag, when set, currently forces the Mica brush to render in dark mode, so it has to be toggled on or off depending on the current Windows theme.
That means we need some way to detect theme changes, and while you could use some more Win32 for that, I got lazy and just slapped ModernWpf on top of the app:
    private void Window_ContentRendered(object sender, System.EventArgs e)
    {
        // Apply Mica brush and ImmersiveDarkMode if needed
        UpdateStyleAttributes((HwndSource)sender);

        // Hook to Windows theme change to reapply the brushes when needed
        ModernWpf.ThemeManager.Current.ActualApplicationThemeChanged += (s, ev) => UpdateStyleAttributes((HwndSource)sender);
    }

    public static void UpdateStyleAttributes(HwndSource hwnd)
    {
        // You can avoid using ModernWpf here and just rely on Win32 APIs or registry parsing if you want to.
        var darkThemeEnabled = ModernWpf.ThemeManager.Current.ActualApplicationTheme == ModernWpf.ApplicationTheme.Dark;

        int trueValue = 0x01;
        int falseValue = 0x00;

        // Set dark mode before applying the material, otherwise you'll get an ugly flash when displaying the window.
        if (darkThemeEnabled)
            DwmSetWindowAttribute(source.Handle, DwmWindowAttribute.DWMWA_USE_IMMERSIVE_DARK_MODE, ref trueValue, Marshal.SizeOf(typeof(int)));
        else
            DwmSetWindowAttribute(source.Handle, DwmWindowAttribute.DWMWA_USE_IMMERSIVE_DARK_MODE, ref falseValue, Marshal.SizeOf(typeof(int)));

        DwmSetWindowAttribute(source.Handle, DwmWindowAttribute.DWMWA_MICA_EFFECT, ref trueValue, Marshal.SizeOf(typeof(int)));
    }
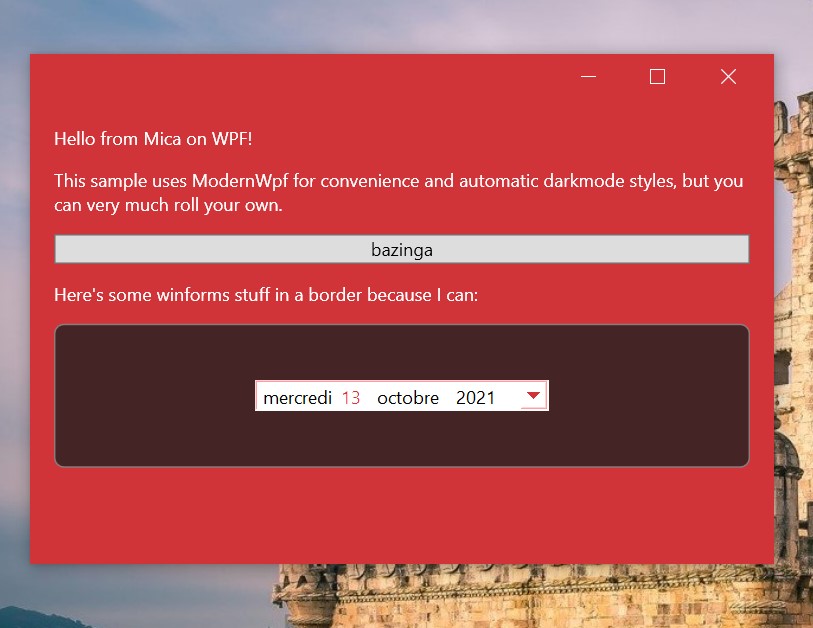
ModernWpf also allows you to easily have Theme-aware resources on WPF, which is super convenient and basically gives us our final sample:
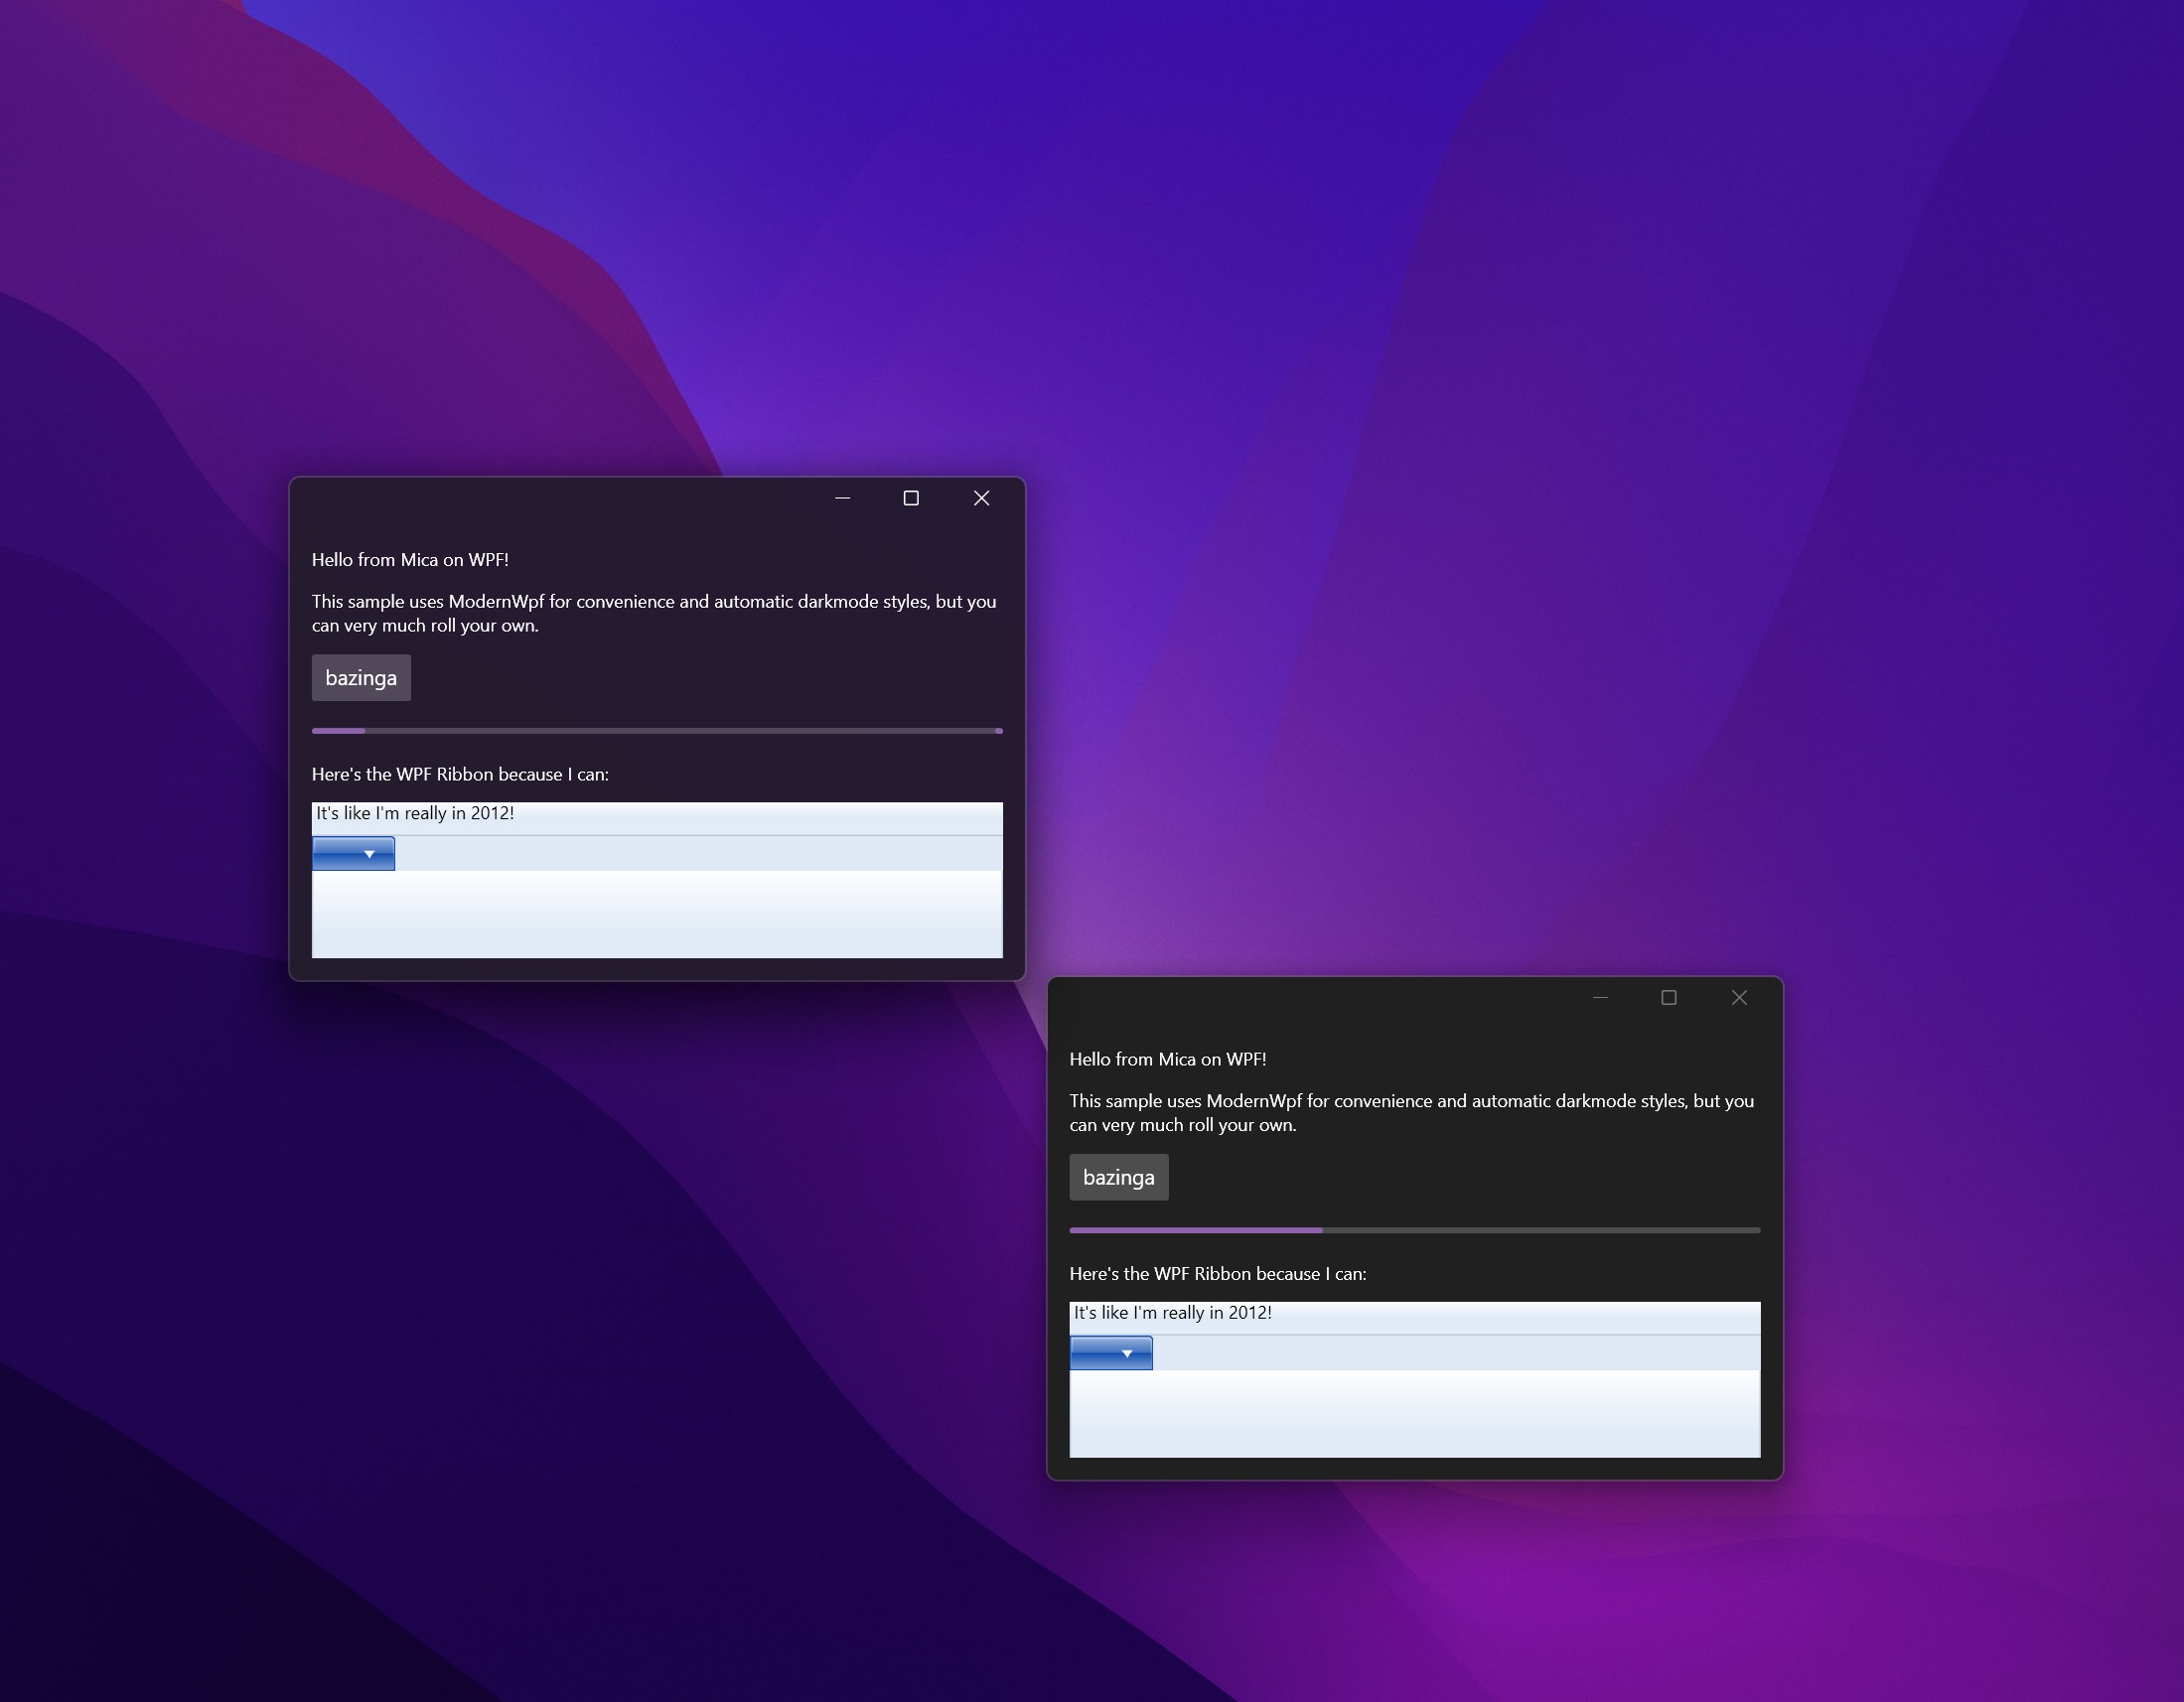
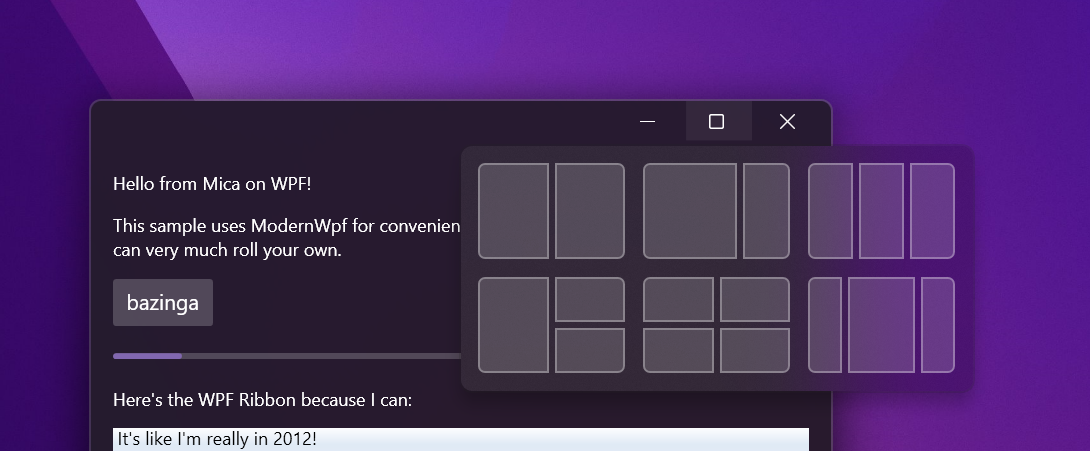
And since we left in system controls, that means we get Windows 11's snap assist out of the box like all the cool kids do:
You can find the full sample here.
Closing thoughts
If you run this sample on Windows 10, both those DWM Attributes do nothing, so you're left with the kinda boring Windows 10 chrome:
Which will respect the user's Apply the accent color to the window borders preference, so you'll either have an accent color like I do, or pure black/white.
You can toy with the GlassFrameThickness attribute if you want to reclaim some non-chrome space. 👍
You might've noticed the system controls have a weird padding to the right: This comes from WindowChrome not having been updated for Windows 10 and keeping the old window border sizes.
This is fixable by adding NonClientFrameEdges="Bottom,Left,Right", but it causes a host of other issues so I didn't include it in the sample.
You can find some more info about that here.
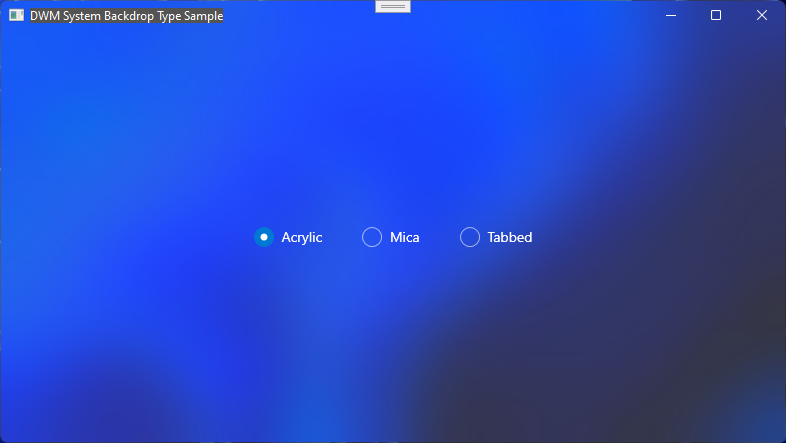
Windows 11 22523+ Update
DWMWA_MICA_EFFECT = 1029 has been replaced by the public API (!) DWMWA_SYSTEMBACKDROP_TYPE = 38 in build 22523, which functions mostly the same although with some much-desired improvements.
The attribute accepts an int instead of just a boolean and can enable different backdrop types:
DWMSBT_AUTO = 0,
DWMSBT_DISABLE = 1, // None
DWMSBT_MAINWINDOW = 2, // Mica
DWMSBT_TRANSIENTWINDOW = 3, // Acrylic
DWMSBT_TABBEDWINDOW = 4 // Tabbed
As per StartIsBack, "Tabbed is just untinted / unblended Mica, i.e. heavily blurred wallpaper."
You can find updated WPF sample code that uses this attribute here.