
The Sonic McOrigins timeline
- Original announcement
- 2022 SAGE release (You are here)
- 2023 "Plus" SAGE release
- Tony Hawk's McOrigins Plus Chrismtas
Check here for the latest McOrigins-related post (and download links 🍟)
Well, it's been 4 months since work started on that LCD simulator engine, and what's been done since then?
17 games!
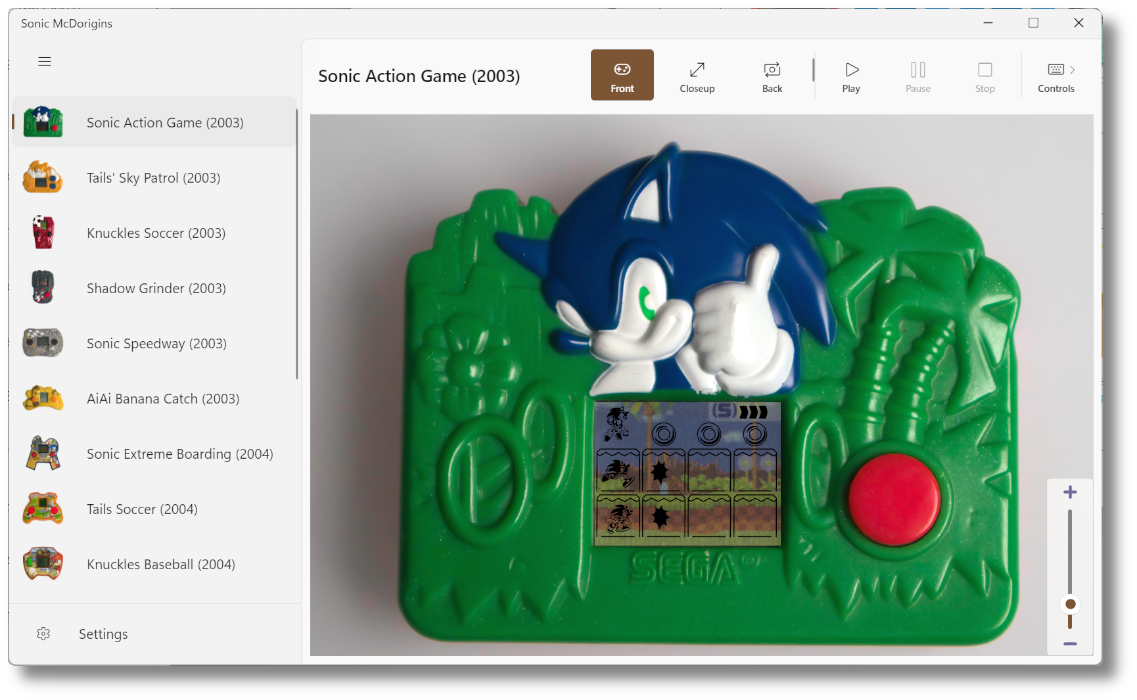
I've digitized my entire collection, and found time to even get some extra ones off eBay to add to the SAGE build.
(And yes, that includes Big's Fishing! It almost lived up to my 16-year hype.)
You can now go grab the SAGE build at the matching booth, for Windows, macOS, and Linux!
While I've already talked about the tech stack in the previous blogpost, here are a few extra words about the actual digitizing process, and other fun things I got to do along the way.
So read on! (Or go have fun with the games and then read on, I'll be waiting)
Digitizing them LCD Games (⚠️ jank warning)
The digitizing process was certainly the longest part of all this; Thankfully all of the McD LCD games are built the same (read: extremely cheaply), so it was not necessarily difficult, just tedious.
How to digitize a McD game you ask? I'll get to it, but first we must talk about voltage dividers!
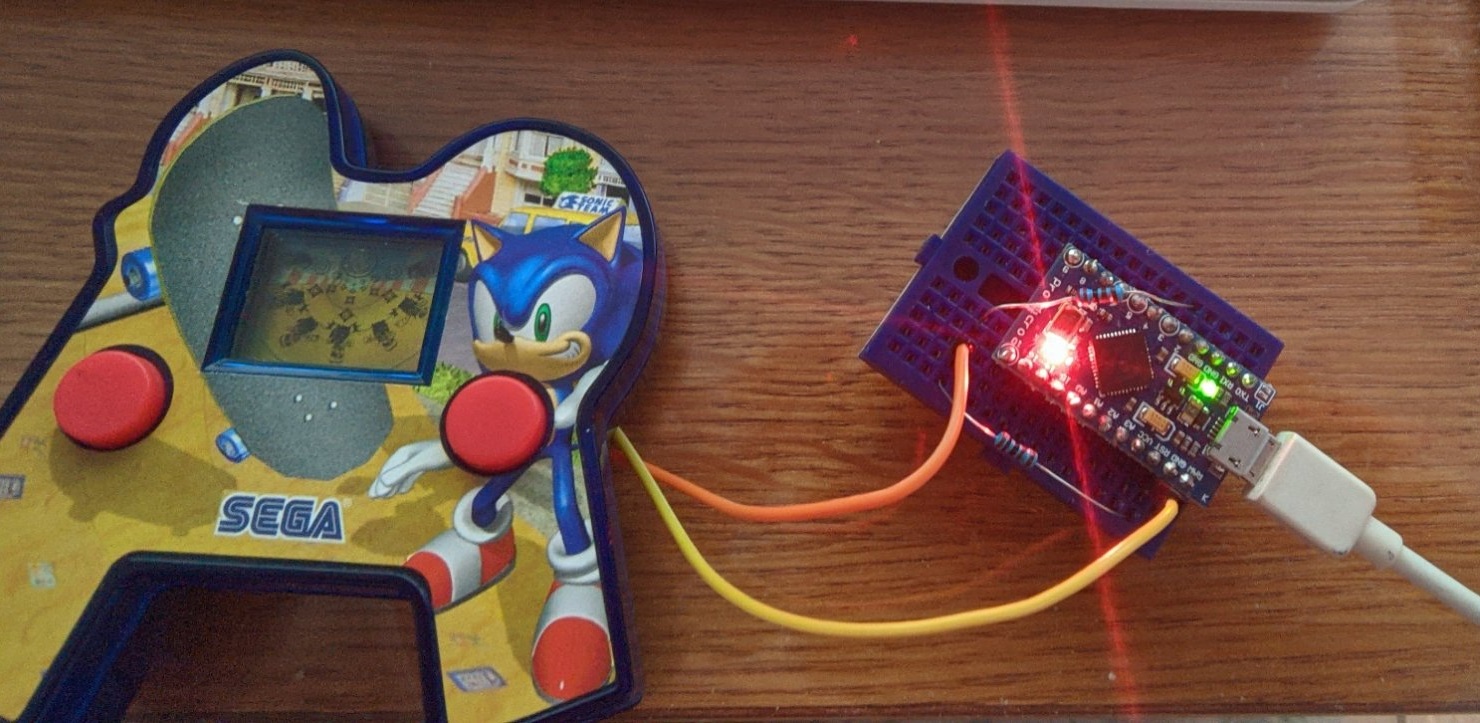
The McDonald LCD games all run off a 1.5V coin battery, and most of the batteries in my OG games were halfway dead/leaking.
I "could" have just gone and bought new batteries since they're replaceable (only in the European versions though!), but that'd be no fun.
A Voltage divider essentially allows you to get a lower voltage out of a higher one for small currents -- In this case the 5V coming out of a USB plug. This allows us to power the games with no batteries!
"But m8" you might ask, "why is there an Arduino chucked in the middle of this hot mess?"
If you've ever played a LCD handheld game, you might know than when the game is turned on, all the elements will show up for a few seconds, then blank out so the game can be started.
Having all the elements shown at once is paramount to digitizing the game!
It allows you to take a clean scan of all of them at once, which we can then turn into a vectorized graphic. The main issue is that you can't really take a good picture/scan in only two seconds.
If only there was a way to have the game stay in that initial state forever...
Well, that's exactly what the Arduino is here for, and it is atrocious!
int RXLED = 17; // The RX LED has a defined Arduino pin

void setup() {
  // put your setup code here, to run once:
  pinMode(2, OUTPUT);
  pinMode(RXLED, OUTPUT);
}

void loop() {
  // power on
  digitalWrite(RXLED, !digitalRead(2));
  digitalWrite(2, !digitalRead(2));
  // wait 2s
  delay(2000);
  // power off
  digitalWrite(RXLED, !digitalRead(2));
  digitalWrite(2, !digitalRead(2));
  // wait just long enough for the logic to reset but not the screen
  delay(1);
}
Real engineers would probably hurl at the mere thought of using a 5$ microcontroller as a glorified timed power switch. But it works!
Once the game disassembled and the background removed, it's now pretty easy to take a picture of the whole thing.
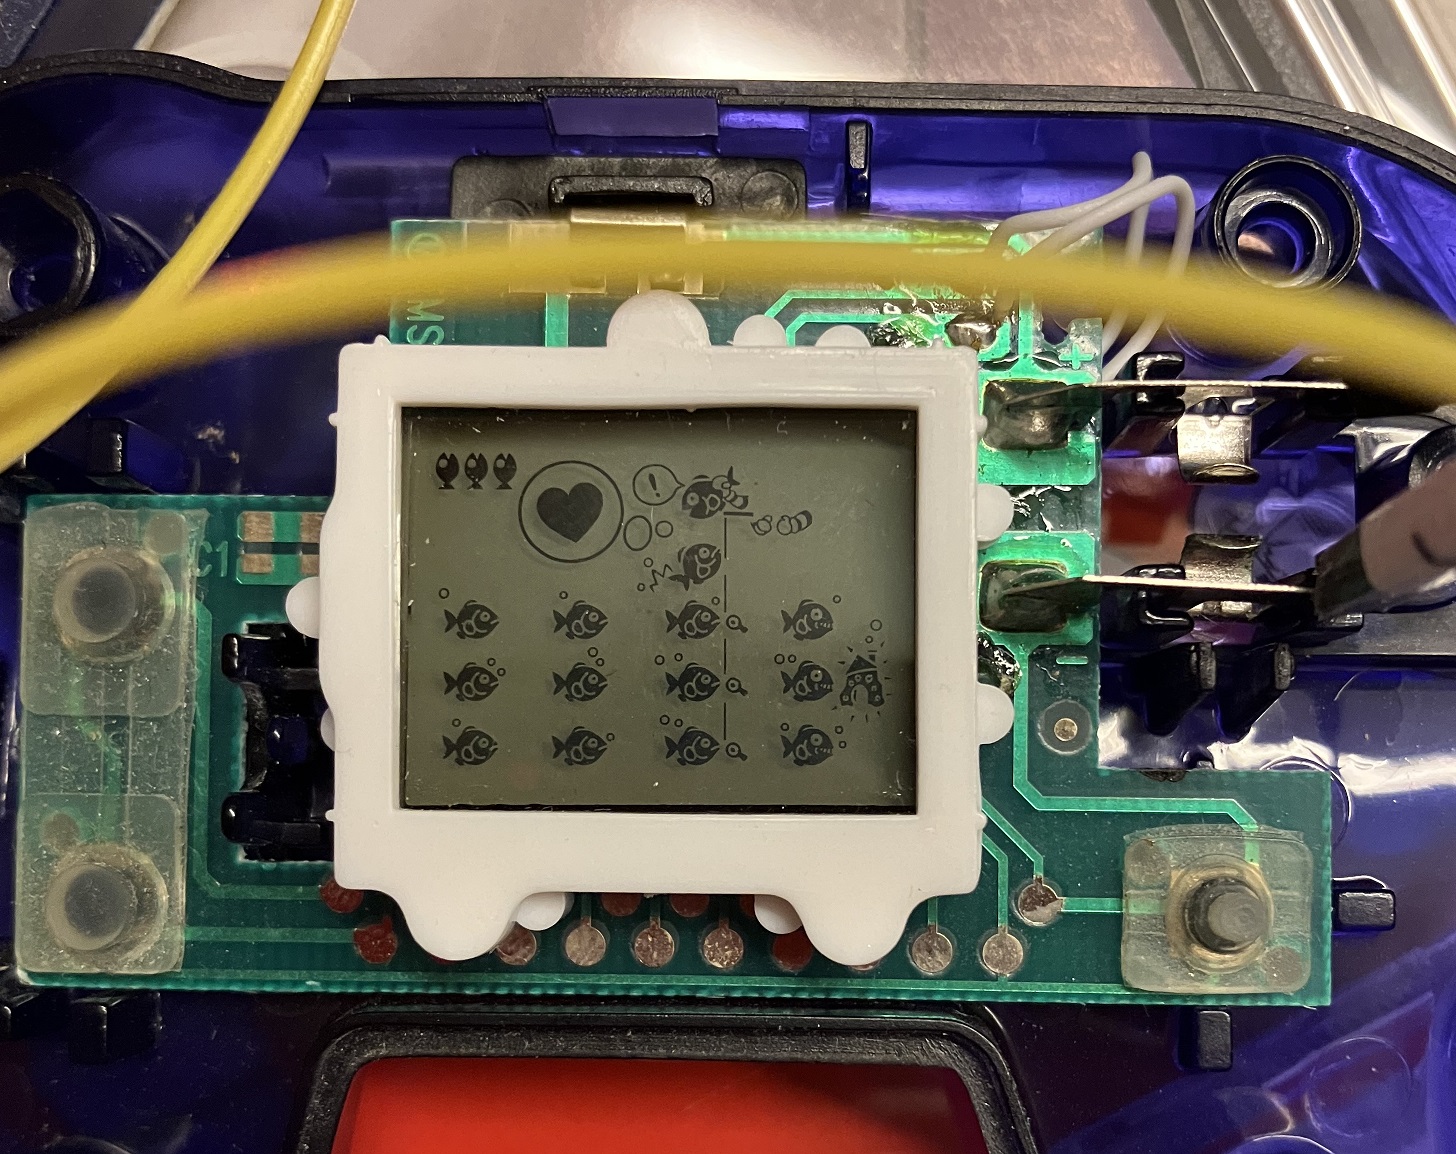
...with an iPhone SE, which is the best close-up/macro camera I had on hand. I don't think I'm cut out for this preservation business lads
The way the LCD screens are built in those games sadly prevents flatbed scanners from being used, so I used shots like this to vectorize the elements to SVG. Which wasn't that painful all things considered!

The backgrounds are simple flat bits of cardboard, and those could be scanned easily.
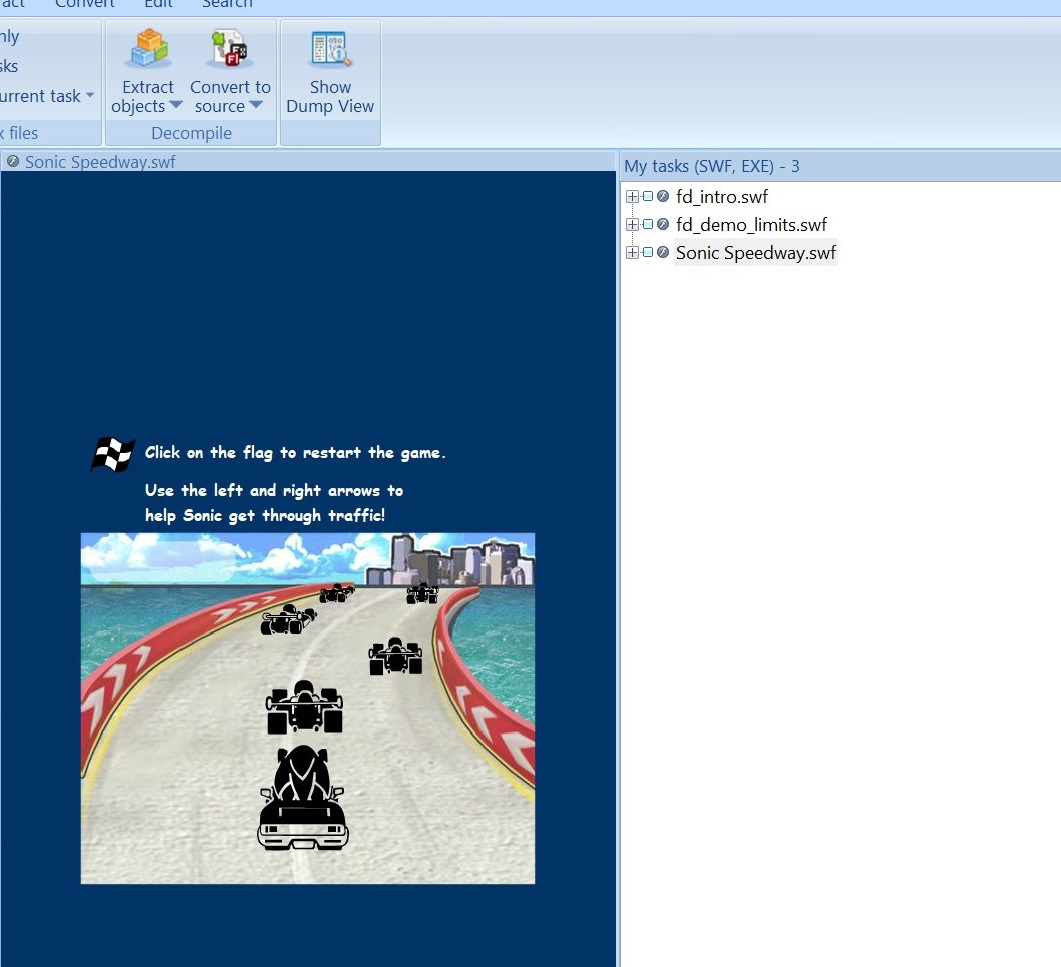
As a fun side-note, there was one game where I didn't need to do any of this stuff, as it'd been ported to...Flash back in 2005 for some weird cross-promotion.
I didn't think I'd end up using a flash decompiler for this project, but here we are!
The Icon
I used Spline to make the icon:

As with everything else related to this project, it looks more like an app than a fangame logo...
I had this "Sonic item monitor containing the mcdonald arches" idea stuck in my head, and I think it looks cool!
3D abstract forms are one of the easiest thing to make in Spline, so it seemed logical to use that to slap some Sonic box art shapes on top as well.
![]()
The burger alt is in case mcd lawyers come after my ass
As another fun fact, the texture used for the box is the one from Generations.
Avalonia X-Plat UI fun
While Avalonia allows you to essentially have the same UI/UX on all operating systems, that doesn't mean you can't actually customize things a bit!
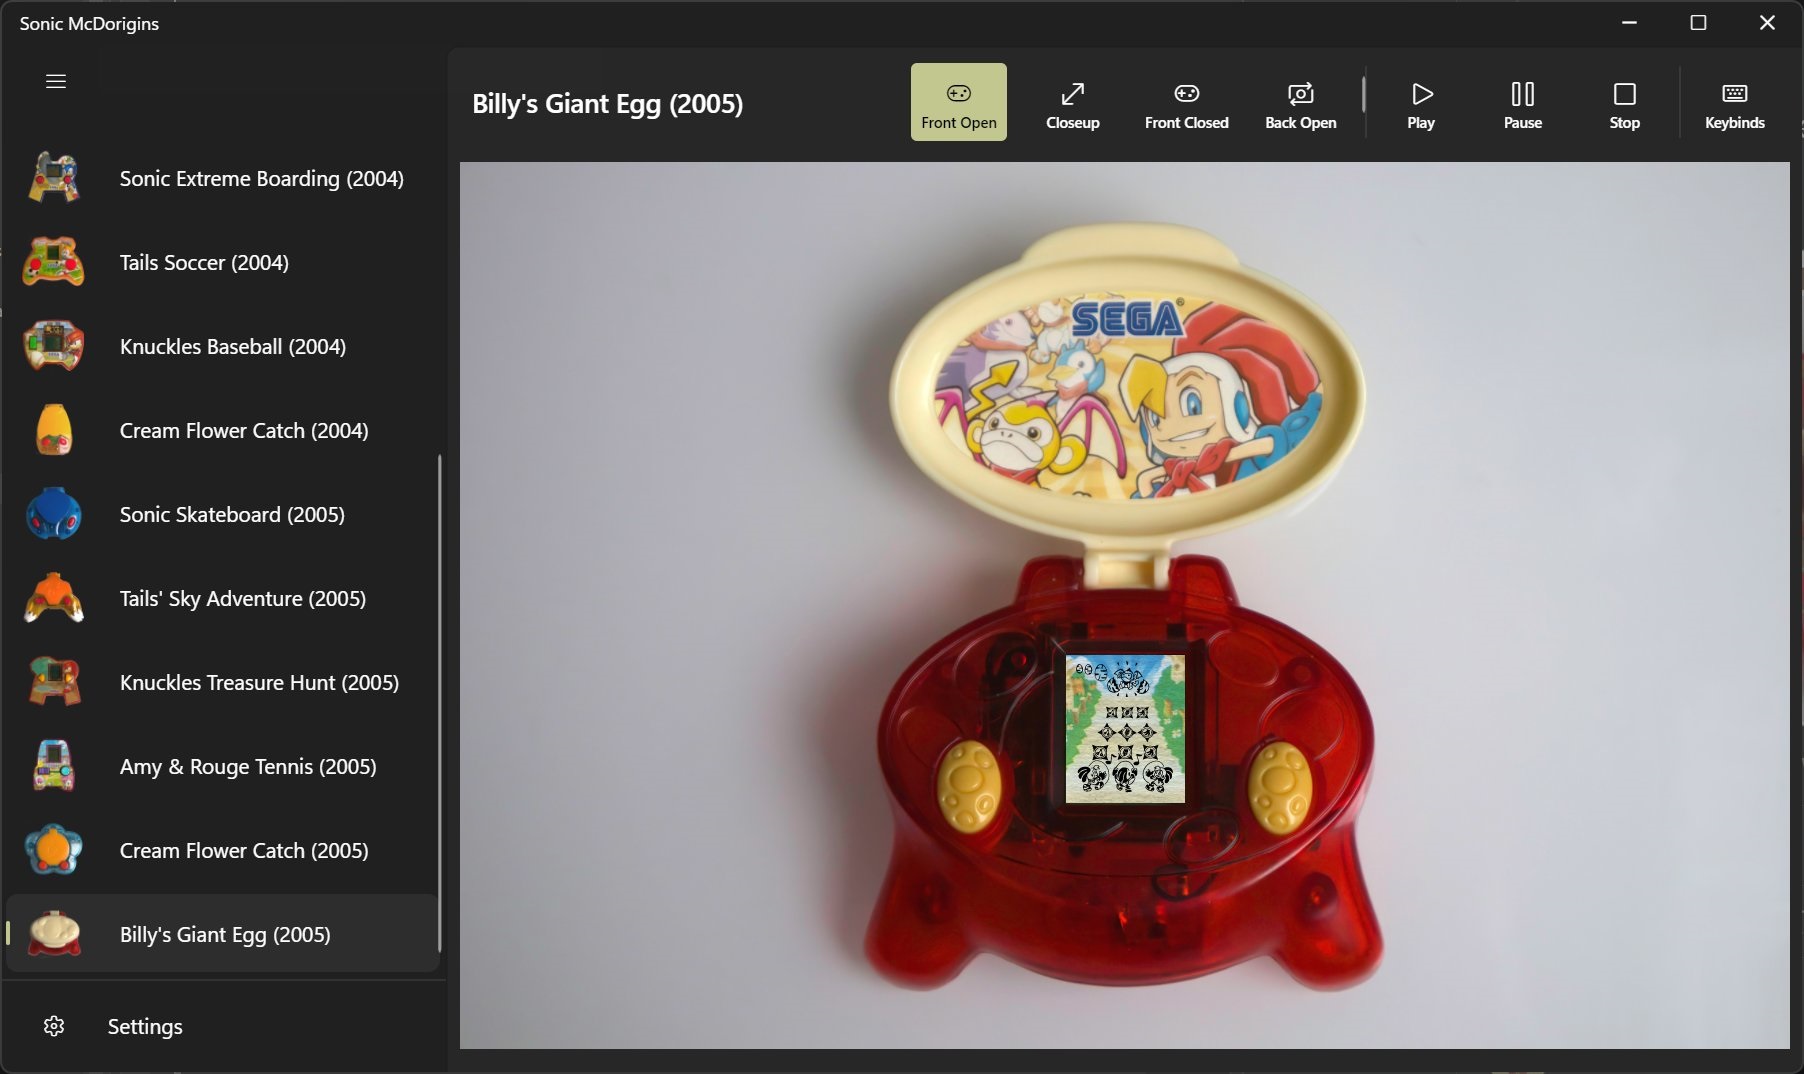
I won't pretend to fully follow the Mac HIG with this silly fangame either, but with some tweaks it's fairly easy to go from the default FluentAvalonia Windows-friendly look:
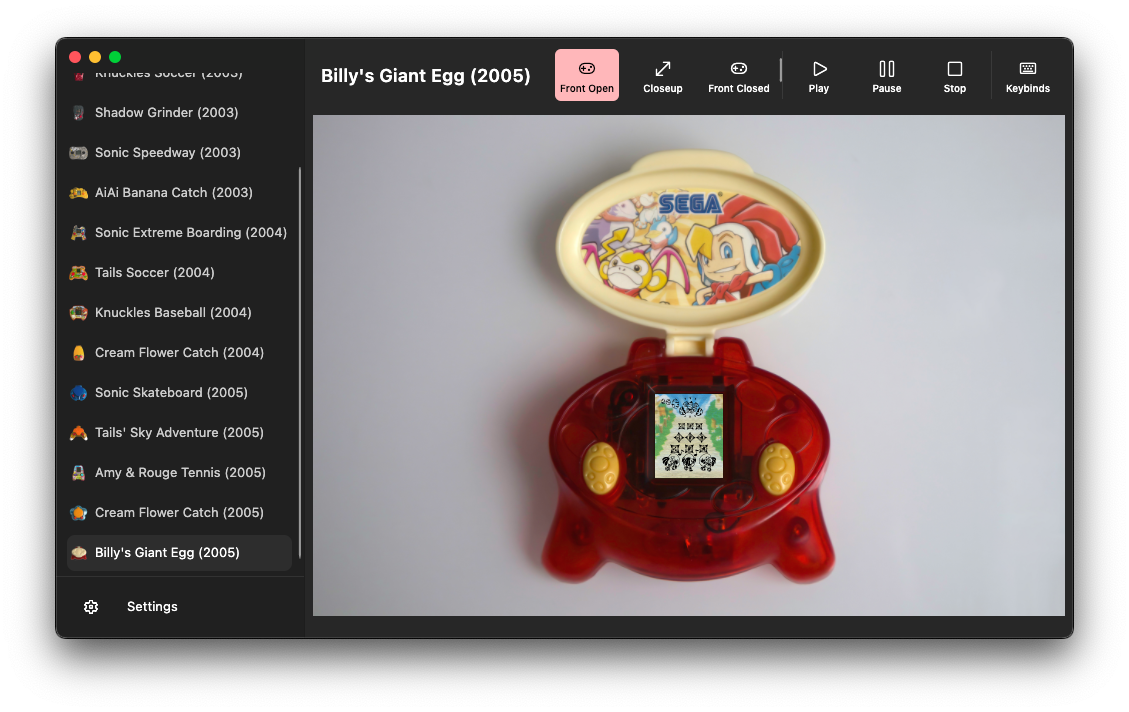
to a look that fits on the Mac:
Instead of what it'd look like by default:
One might argue that this mostly works just because post Win-11 Windows and post-Big Sur macOS look similar in a lot of ways, but I'll take the easy win here!
Modifying WinUI to fit on macOS does require some retemplating(notably to change the size of the menu items on the left there), but some simple resource overriding will already take you quite a few steps further:
// At app initialization
if (System.OperatingSystem.IsMacOS())
{
    // Macify the styling a bit
    Resources.Add("ControlContentThemeFontSize", (double)13); // Make the font size smaller
    Resources.Add("ContentControlThemeFontFamily", new FontFamily("SF Pro Text")); // Forbidden Apple font
    Resources.Add("ControlCornerRadius", new CornerRadius(6)); // HIG corner radius
    Resources.Add("NavigationViewContentGridCornerRadius", new CornerRadius(0)); // Remove the navview corner radius so it looks like a straight line instead
    Resources.Add("NavigationViewExpandedPaneBackground", Colors.Transparent);
    Resources.Add("NavigationViewDefaultPaneBackground", Colors.Transparent);
}

// When instantiating your main window
if (OperatingSystem.IsMacOS())
{
    // More Macification
    NavigationView.PaneDisplayMode = NavigationViewPaneDisplayMode.Left;
    NavigationView.OpenPaneLength = 248; // Width of the menu
    NavigationView.IsPaneToggleButtonVisible = false; // Leftside menu is always open
    NavigationView.PaneCustomContent.Height = 32; // Custom padding

    var thm = AvaloniaLocator.Current.GetService<FluentAvaloniaTheme>();
    if (thm?.RequestedTheme == "Dark") // Custom outer border to simulate macOS' dark theme window decoration -- Add this in XAML yourself!
        MacWindowBorder.IsVisible = true;
}
Another trick involved is to hide the (ugly) default title bar and use custom drag regions to make the window draggable.
You can check the actual source code if you're interested in learning more. 🧑💻
I didn't bother on doing something similar for Linux since it's not like Linux has a coherent design language to begin with! OHOHOHOHOHO

